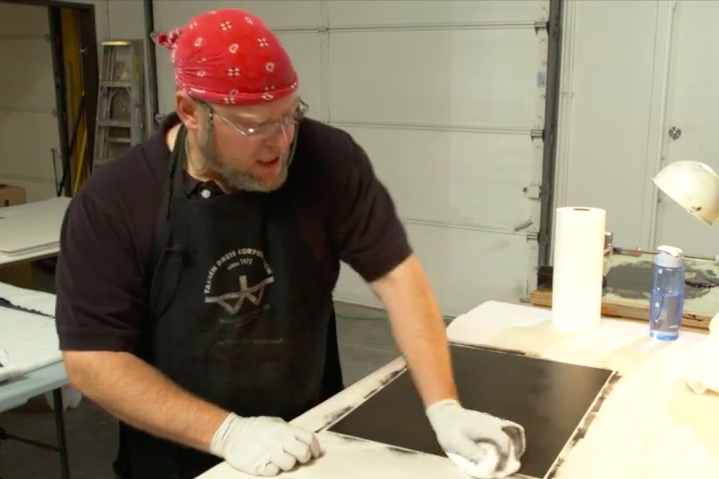
Part 3: Brayering and Wiping the Plate
Watch this Video:
|
Previous Page:
|
Next Page:
|
Video Transcription Index | Watch All Printmaking Videos
|
The following is a text transcription of Part 3 of our short, 7-part video tutorial series on photogravure intaglio printmaking using Intaglio Editions polymer photogravure plates.
How one applies ink can affect the amount of ink that winds up on and within the print itself. It can also affect the integrity of the plate and subsequent prints. Careful application of the ink using a brayer is a secret used in copper-plate photogravure printing to ensure less abrasion is caused when applying ink to the plate. Proper wiping habits and techniques are criticial to ensure optimal depth, richness and tone. Overwiping creates brighter, but flatter prints, in general. Leaving too much ink on the plate can mask detail.
Print workshops by artist, educator and printmaking instructor Ron Pocrasso is a master at composing multi-layered monoprints incorporating photogravure with delicate brayering, in conjunction with monotype, collage, and colle. Ron, along with his beautiful printmaking studio in Santa Fe, New Mexico is available for private instruction.
Video Transcription: Part 3 - Brayering and Wiping the Plate
Demonstration of wiping a photogravure polymer plate for intaglio
Jon Lybrook, Intaglio Editions - March 2014
"So now that it's charged, we're going to apply the ink to the plate...just roll it on, nice and smooth. The objective is to cover the entire plate with the ink so you know it's completely covered before wiping it with tarlatan. You may have to charge the roller a few times depending on the size of your plate.
So then what we like to do is we take tarlatan, which is essentially cheesecloth with some starch applied to it, and we will wipe the plate with this. I prepare the tarlatan ahead of time by soaking it in water for about 20 minutes and agitating it, wring it out, let it dry first. That removes some of the starch that could potentially scratch the plate and just makes it generally nicer to use. So after it's dried, I pull apart the tarlatan because the starch will cause it to stick together a little bit. Ideally you start wiping with the dirtiest tarlatan you have, and I don't have any dirty tarlatans yet so we're just going to start with this one, but the idea is you start with the dirtiest and work cleaner and cleaner as you wipe and reveal more and more of the image. And so what I like to do is apply the ink to the plate with this twisting motion, so I'm kind of pushing down with a little bit of force and pushing the ink into the microscopic pits that allow the plate to hold the ink. I'll twist it in one direction while I'm wiping and then once I'm at the end I might change the direction too to get the ink in different angles into the plate, and just makes for a richer looking image.
So the circular motion I just do it first to kind of soften up the ink and to get it malleable and doing what I want. So then as I continue to wipe the plate I'll do it less aggressively, it'll get softer...the wiping will become easier.
So now's a good time to actually wipe the edges, I like to get the plate really...roughly clean and then do a preliminary wipe of the edges. Sign of a good print is you don't see a lot of residual ink on the edge, and so that's why wiping the edge is very important and we'll do it a couple of different times...just right now I'll get the majority of the ink off the edge.
I kind of approach it on the angle to the edge of the plate too, and kind of push the ink onto the back area so when you wipe you can see how much ink is coming off the edge and you want to just keep on wiping until there's no more ink left on the edge.
Now that we've completed the preliminary edge wipe we're going to finish wiping the surface of the plate. The tarlatan should be kind of a flat pad like this. You don't want it to be too much of a sphere or folded over. You want it to be a nice flat surface to smear the ink in a natural way.
So now you'll notice I've changed the technique from the grind that I was doing before to this kind of light buffing sort of motion. So you can see where there's ink starting to break up and be removed, but there's still clumps of it which we need to get rid of, and so we do that by gently continuing to apply wiping techniques to the plate until all the ink comes up in the highlight areas and then move it into the shadow areas where we need the ink.
And so I'm putting very little pressure on the tarlatan at this point, just kind of buffing out the clumps of ink and moving them into the darker regions of the print. And the thing I like to do to evaluate how well a plate has been wiped is to just look at it on certain angles, you see whether or not there's ink in areas where it's not supposed to be, and you just clean it out. It's important not to over wipe the plate too which cause your highlights to blow out and you'll lose detail...so you want just the right amount of pressure.
Now we're relatively clean on the plate, I'm going to do a final wipe of the edges."
|


