Part 2: Mixing the Ink
Watch this Video:
|
Previous Page:
|
Next Page:
|
Video Transcription Index | Watch All Printmaking Videos
|
The following is a text transcription of Part 2 of our short, 7-part video tutorial series on photogravure intaglio printmaking using Intaglio Editions polymer photogravure plates. Having experience mixing ink allows you to duplicate formulas for certain ink colors. Color matching is one of the more challenging aspects of fine and commercial printmaking, which is why editioning a print all at once is so prevalent in the craft. Not only does it better ensure integrity in the edition, but it shows the investment made in the work of the artist.
There is a great range in the quality of different inks. This is true within brands as well as among them. Finer particles of pigment suspended in the better-quality inks tend to sit deeper in the fine pits of Intaglio Editions high-resolution plates. Intaglio printing has the ability for ink to sit both embedded in, and on the paper. Ink suspended on the surface of the plate tends to produce flatter areas of the image, which is why proper wiping of the intaglio plate is so critical. Find an ink and paper combination that works well for you and explore with the objective of repeating techniques that bring out the desirable nuances polymer photogravure has to offer.
Video Transcription: Part 2 - Mixing the Ink
Demonstration of etching ink preparation
Jon Lybrook, Intaglio Editions - March 2014
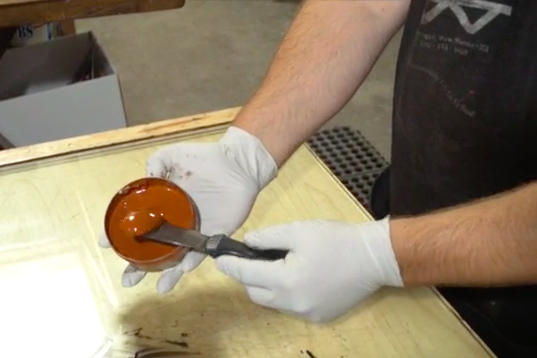
"The first thing we do is prepare the ink, so I'm going to mix up some colored inks for one of my clients and we've got a very interesting combination of sepias and browns today we're going to be printing.
At Intaglio Editions we like to use Charbonnel Inks which is a French manufacturer of fine inks, and so we've got in this case, some raw sepia, red ocher, and carbon black. We really like the carbon black because it's about as black as black can be, it's very dark, very opaque.
I'm going to be printing about five to 10 prints today, so I'm going to try to portion out just the amount of ink we'll need for that. This ink has been sitting for a while, so it's got a little bit of a skin on it, so we'll take that off...get some of that junk out...just throw that away...
And so the idea is to put down as much ink as you'll need for the day, and over time you get good at judging how much that is exactly. So for this we're going to use even proportions of each of these three colors...get some of that dried gunk out. This is why tubes are nice, because tubes don't skin up like [ink in the can], and so there's less to have to do. Of course it cost more money to buy it in small tubes. Sometimes you can put a little heating pad underneath [the inking area] to warm up the ink so that it flows more smoothly... temperature very important...the temperature really does make a difference with this process. And so you want the ink to be fairly loose...this looks like a pretty good consistency. Anything that is non-ink we'll want to remove and get off the glass because that can wind up on your plate, and scratch your plate, potentially.
So there's a nice-sized pile of the raw sepia, so I'm going to approximate that same amount of ink for this color.
So this ink is...this red ocher is a little looser. It's a different consistency than the raw sepia ink.
So in addition to those two, I'm also going to add some black, so I need a similar amount of black. The reason we work the ink up is to loosen it up, but also to examine it for any particles that we might not want in the plate or on the plate or in the print.
So I'm going to take a little bit out of this pile just because it looks like that ink might be a little bit too much compared to these other two, and the black ink...that looks about right... and the red ocher looks about right. You can always add more ink...you can always add more black too so...
Now I'm going to...now that we've got these three pretty much in proportion, I'm going to mix them all up and we'll see what we get!"
|


