Step 1: Preparing the Plate
Previous Page:
|
Next Page:
|
Video Transcription Index | Watch All Printmaking Videos
|
The following is a text transcription of Part 1 of our 7-part video tutorial series on photogravure intaglio printmaking using Intaglio Editions polymer photogravure plates.
For information about making your own polymer photogravure plates, click here.
Video Transcription: Part 1 - Preparing the Plate
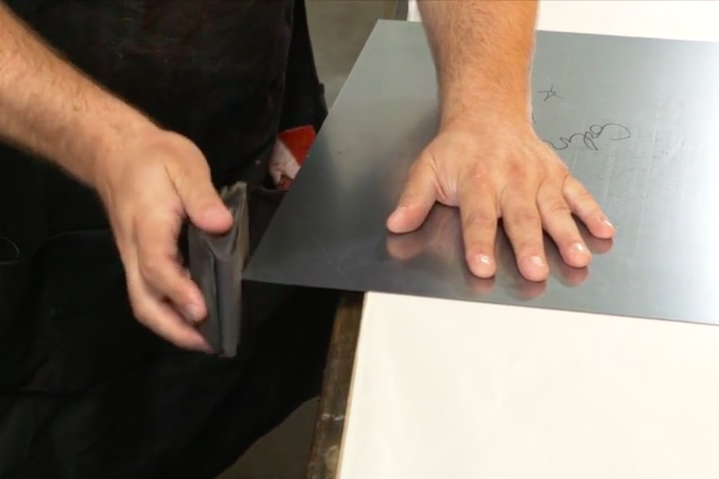
Demonstration of sanding a steel-backed polymer plate before printing
Jon Lybrook, Intaglio Editions - March 2014
"Hi, my name is Jon Lybrook and I'm with Intaglio Editions in Boulder, Colorado and I'm going to show you how to prepare and wipe and print your Intaglio Editions plate. These plates are made by Toyobo Corporation in Japan and we found they produce the greatest tonal range possible. We use a special aquatint screen that's customized for maximum tone as well.
This image is called 'The Inseparable', and it's by David Brookover in Jackson, Wyoming, it's a very beautiful photograph, and will make a beautiful photogravure.
The first thing you want to do with this plate once it's been sent to you is sand the edges, because the edges are very sharp. They will cut you, so it's best to sand them, both the top and the sides. So what I do is I take a sanding block and use 220 grit wet and dry sandpaper for these plates -- and it tends to work very nicely. You of course want to avoid scratching the surface of the plate where the polymer is, so I tend to keep everything kind of either on this plane or this plane, kind of on angle.
First what I'll do is I'll sand the edge of the plate, I just kind of put it off the edge of the table and sand on kind of an angle on the back, and that removes a lot of the burs. The other thing I will do is round the corners a little bit, just slightly. It makes it safer and also so it's not such a hard edge that it looks...it looks more hand-made when you put the rounded corner on it I think. A good, hard sanding block is important because you don't want the edge of the polymer plate to cut into the sandpaper and make a mess. I tend to like to have a very hard sanding block when doing this.
It's important during this stage to keep all the dust particles, pieces of metal particles away from your plate because they can come back to haunt you in the form of a scratch. Now that it's sanded, I'm going to protect it and start mixing the ink."
|


